training:software:quick_tour_of_the_2024_robot_template
Quick Tour of the Robot Template
Follow these steps to take a quick tour of the robot template for 2024 and the Crescendo2024 repository. You will need to set the build environment and the robot software repository first.
- Launch VSCode and open the project folder. Execute Simulate Robot Code from the WPI commands icon (Ctrl-Shift-p) or hit F5.
- Hit OK when prompted to select extensions to run. The SimGui should start.
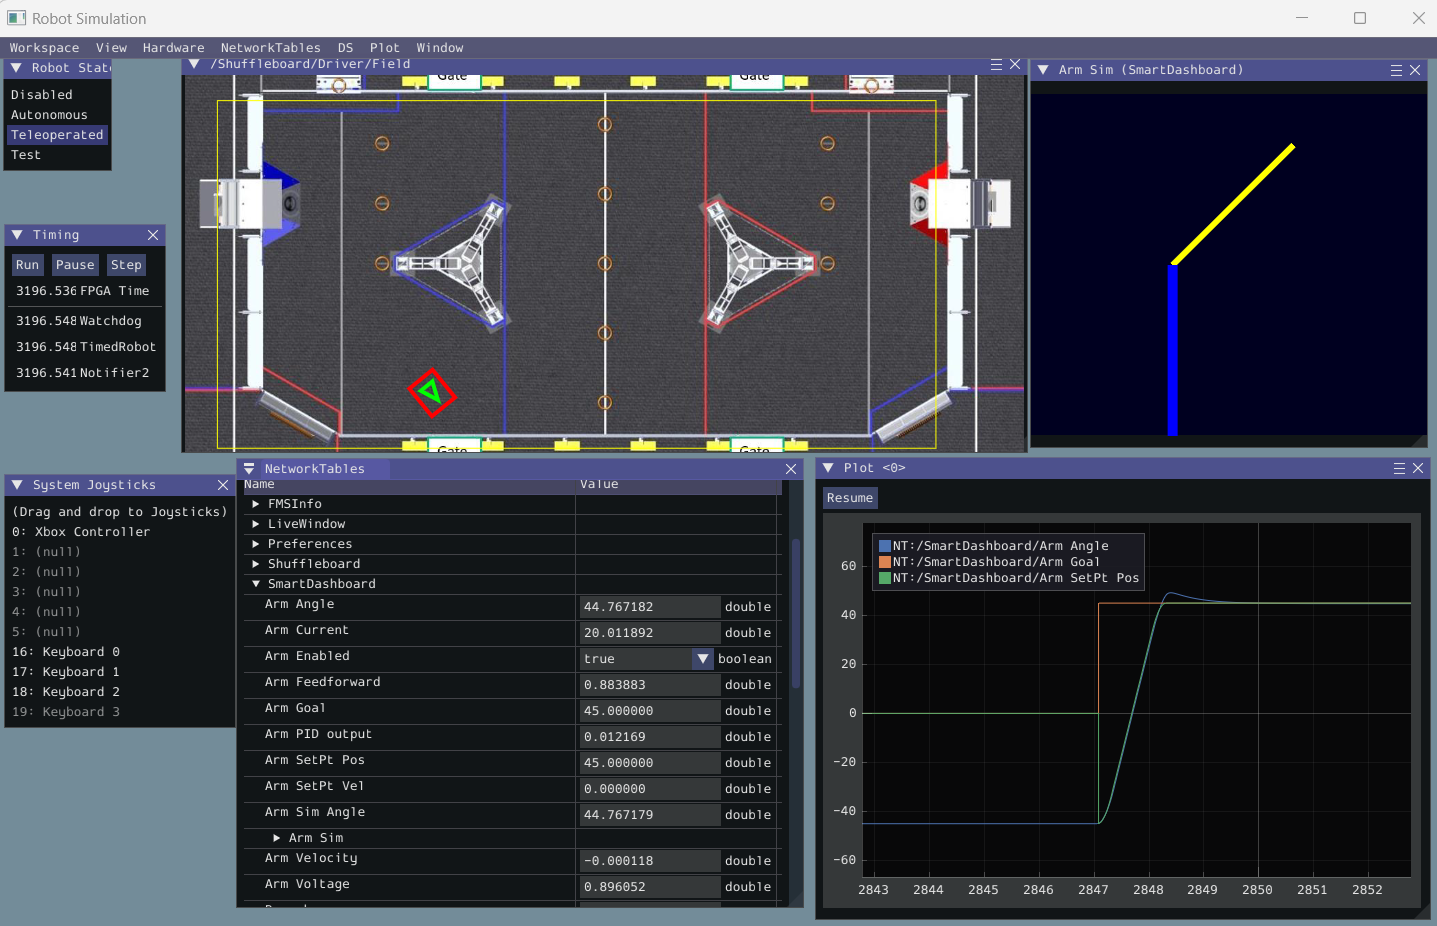
- From the Sim GUI drag an Xbox controller, joystick or keyboard device in the System Joysticks window to Joystick[0] in the Joysticks window. The robot-template code is configured for a single Xbox Controller with all operator inputs from that one controller. [It's easier if you connect an Xbox Controller and use that to control the simulation. You can operate from the keyboard, but you would need to configure the number of axes, buttons and key bindings. Also, keyboard input is only accepted when the Sim GUI window has focus. If you switch to a dashboard window, you won’t have control from the keyboard.]
- To view the simulated arm graphic: from the menu select NetworkTables > Smart Dashboard > Arm Sim. Resize as needed.
- To view the simulated robot driving on playing field: from the menu select NetworkTables > Shuffleboard > Driver > Field. Resize as needed. Right click on the Field title bar, click on Field drop down and set the image to “2024 Crescendo”.
- Program telemetry data published to the dashboard can be viewed from the NetworkTables window (not Network Tables Info) under the SmartDashboard entry.
- To view data as plots: from the menu select Plot > New Plot Window. From the plot window click the Add Plot button. Drag entries from the NetworkTables window to the plot.
- To operate the arm set robot state to Teleoperated from Sim GUI and trigger commands from the XboxController: B - Set goal to the High position, A - Set the goal to the Low position, X - Disable the arm, POV Up/Down - Move goal up/down a small amount.
- To drive the robot around the simulated field, set robot state to Teleoperated and start driving using the selected “Joystick”. (Currently the drive simulation starts at position (0,0) which is outside of the field area and there is nothing preventing you from driving off the visible field.)
- Telemetry including the Field display can also be viewed on Shuffleboard or another dashboard launched from VSCode Start Tool, from the 2024 WPILib Tools folder on the desktop.
- The Field is automatically displayed on the Shuffleboard Driver Tab by the software.
- The simulated arm display is only available in the Sim GUI or the Glass dashboard.
If everything is working correctly you should have the Simulation GUI looking similar to the following:
training/software/quick_tour_of_the_2024_robot_template.txt · Last modified: by Brian Utterback
Discussion